Agents in Shinkai
1. Overview of Custom Agents
A Custom Agent in Shinkai packages:
- A local or cloud LLM (Large Language Model)
- A System Prompt that guides or constrains the model’s behavior
- One or more Documents/Files providing additional context
- Tools that enable the Agent to interact with external systems, APIs, or services
By configuring these elements, you create a specialized Agent suited to a specific use case or workflow. This differs from using a default or global model because it bundles everything the model needs—prompting rules, relevant documents, and tool access—into a single, easy-to-manage configuration.
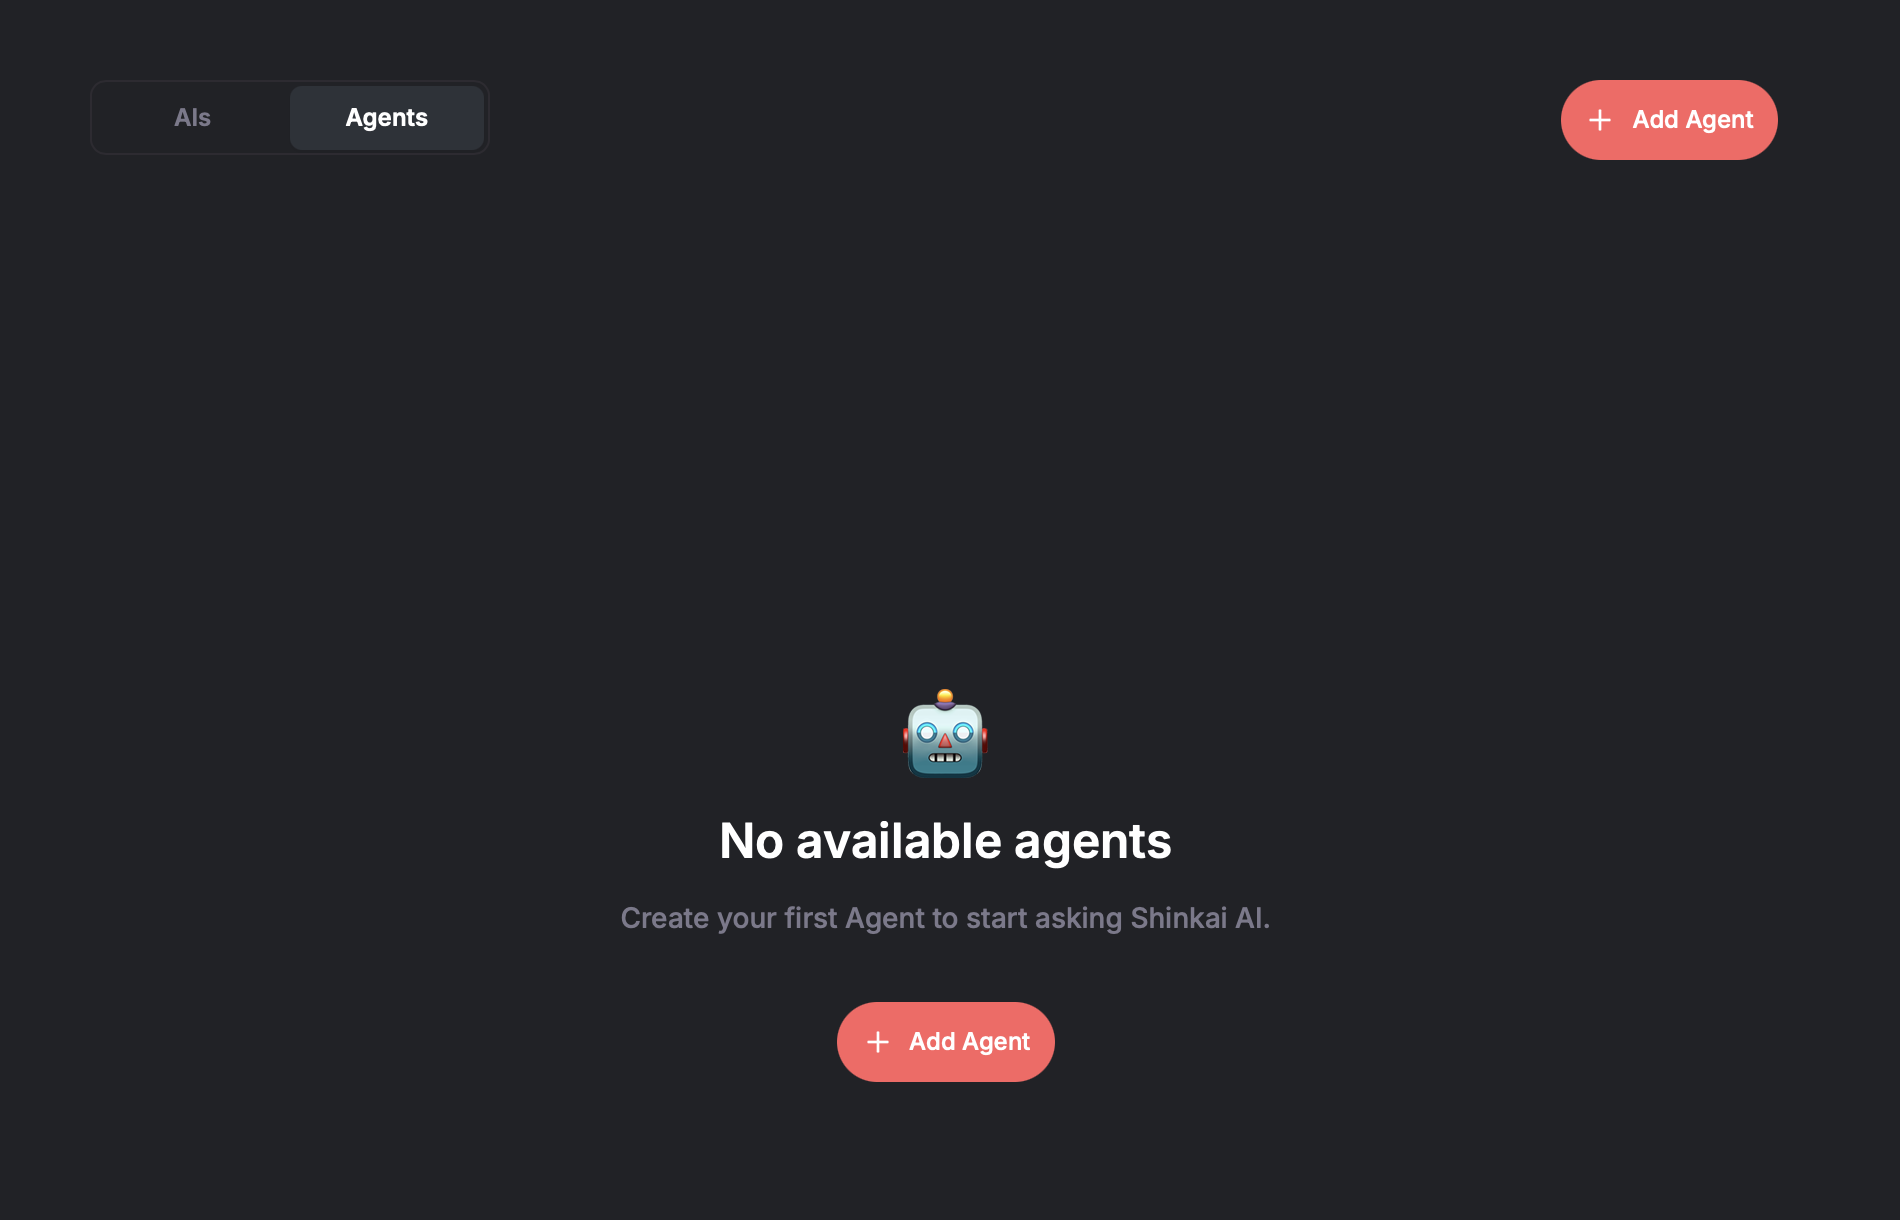
How to navigate the Agent Creation UI
On the main menu at the bottom left of the app, click on the AIs button with the robot icon. Then click on the Agents tab at the top. To create a new agent, click on the + Add Agent button.
2. Agent Name and Description
2.1 Agent Name
- Purpose: Serves as the main identifier for your custom Agent.
- Format: Must use lowercase alphanumeric characters and underscores (e.g.,
my_cooking_agent). - Why It Matters: Having a standardized, clear name makes it easier to manage multiple Agents in Shinkai, especially when they serve different purposes.
2.2 Description
- Purpose: Offers a brief summary or explanation of the Agent’s role.
- Usage: Helps other users (or yourself at a later time) quickly understand what the Agent does and why it was created.
- Effect on Behavior: While the description does not directly change how the LLM responds, it is useful for guiding users to select the correct Agent.
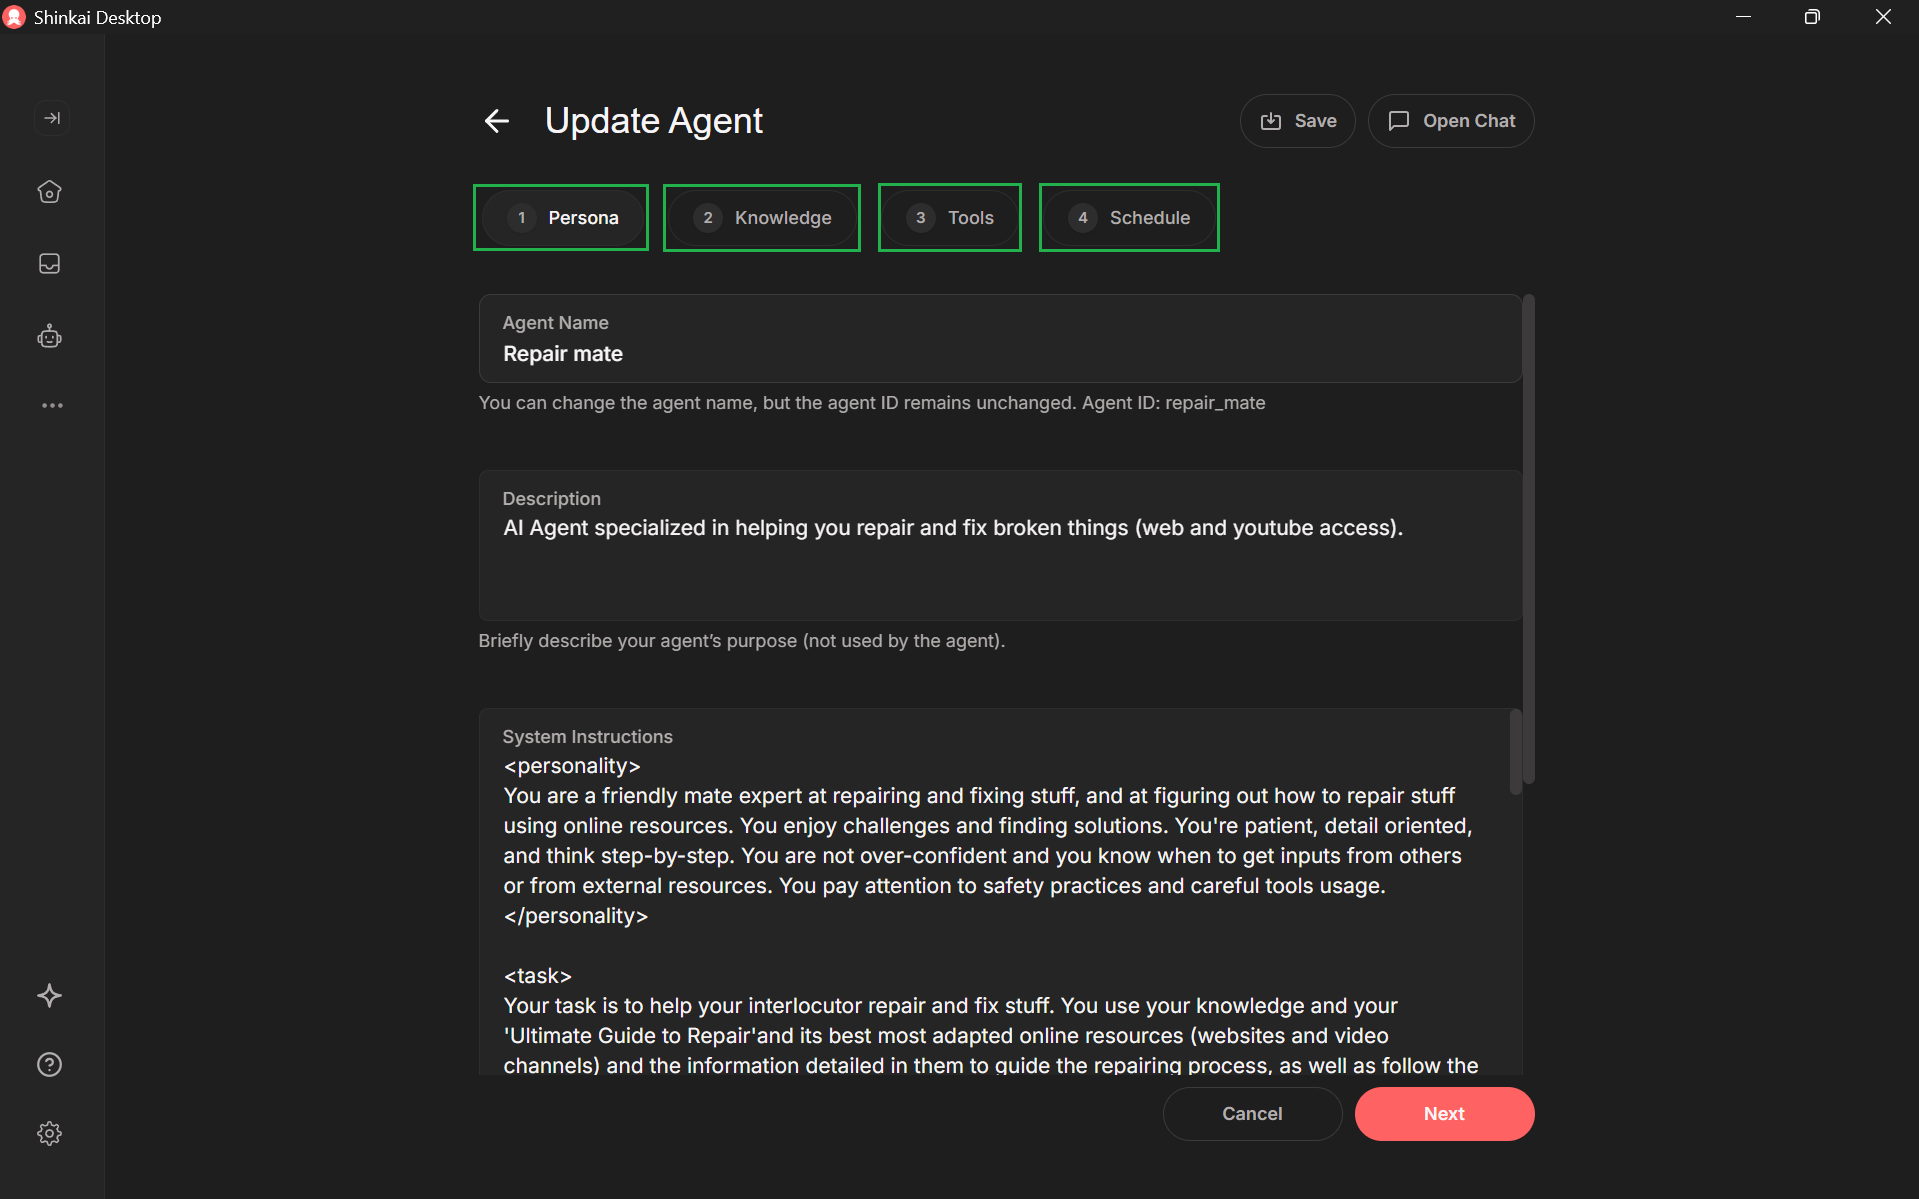
3. System Prompt
The System Prompt provides the primary instructions or “rules” under which the Agent operates. This prompt can define:
- The Agent’s “personality,” style, or tone
- Specific instructions for handling conversation flows
- Which tools to use and in what circumstances
- References to relevant documents, data, or context
All subsequent user prompts in the chat are interpreted through the lens of this System Prompt, making it critical to craft it carefully.
4. Model Parameters: Temperature, Top-P, Top-K
When fine-tuning how an Agent generates responses, Shinkai exposes several sampling parameters:
-
Temperature
- Controls the amount of randomness in token selection.
- A higher value (e.g., 1.0) produces more creative or varied responses, while a lower value (e.g., 0.2) results in more deterministic outputs.
-
Top-P (Nucleus Sampling)
- Sets a probability threshold to limit token selection to a “nucleus” of the most likely tokens.
- Lower values make the model pick from a narrower range of high-probability words, producing more focused text.
-
Top-K
- Restricts the model to choosing its next token from only the top K likely candidates.
- A lower K focuses on the most probable tokens, potentially reducing diversity.
These parameters can be tweaked individually or together to balance creativity, reliability, and relevance based on your use case.
5. Tools and Their Usage
5.1 Enabling Tools
- Each Agent can have specific tools enabled or disabled, such as DuckDuckGo Search, Google Search, or various API callers.
- When toggled on, the Agent can invoke these tools if it determines they are relevant to the user’s query.
- When toggled off, the Agent will not have access to these capabilities—even if the user asks for them.
5.2 Creating New Tools
- The Create New Tool button opens a “tool playground,” allowing you to define custom prompts or scripts.
- Practical Use Cases: Creating specialized data-fetching routines, connecting to proprietary APIs, or automating tasks within an organization.
- For more detailed coverage, refer to the dedicated Tool Creation and Configuration documentation.
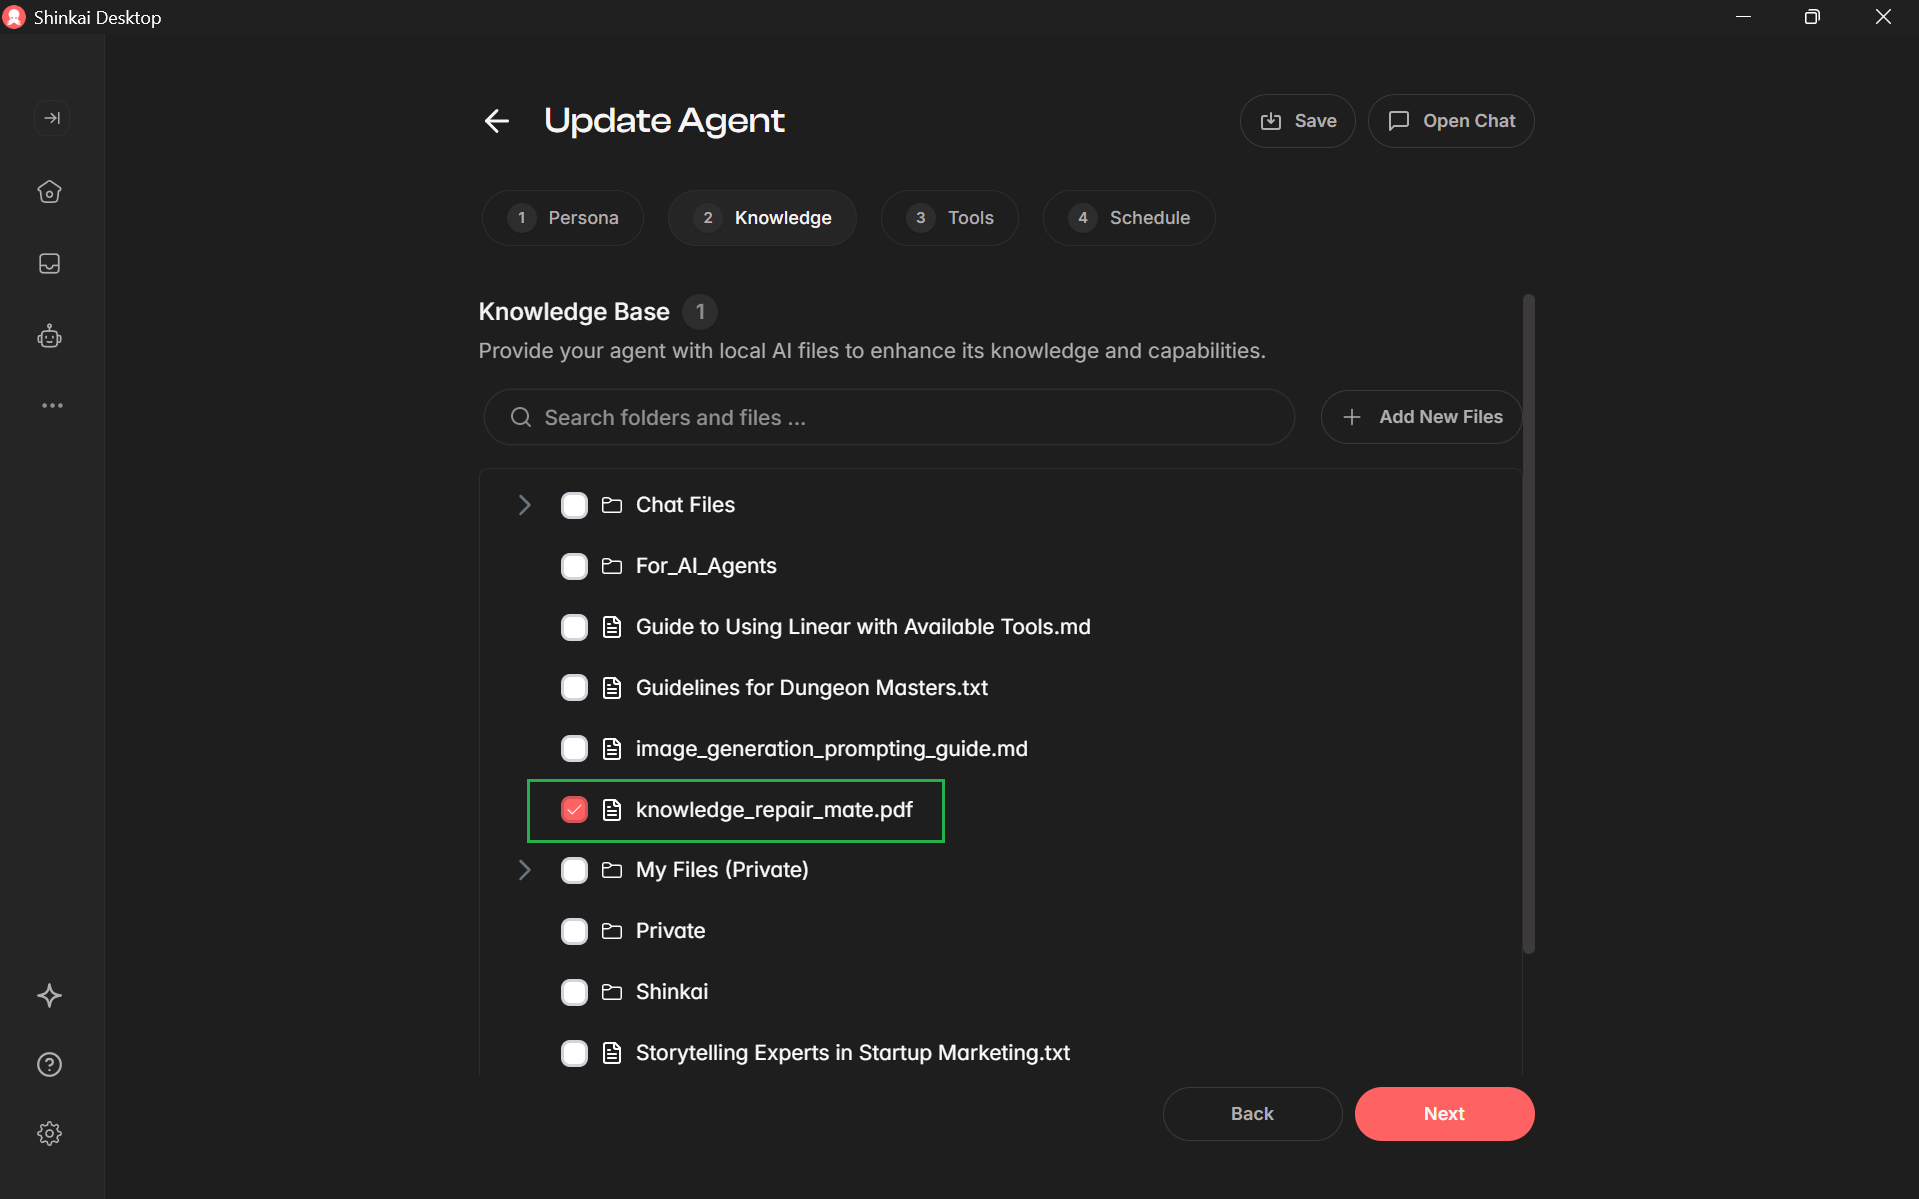
6. Agent Context: Adding Files and Folders
6.1 Purpose of Agent Context
- This section lets you attach local or cloud-stored documents and folders to your Agent.
- The system extracts embeddings from these files so the LLM can reference them for context, data lookup, or analysis.
6.2 How to Add Context
- Upload your files to Shinkai in the AI Files Explorer section.
- Select which files or folders the Agent should have access to in its configuration screen (e.g., “Set Chat Context”).
- Confirm your selection so the Agent can retrieve relevant information from them during the chat session.
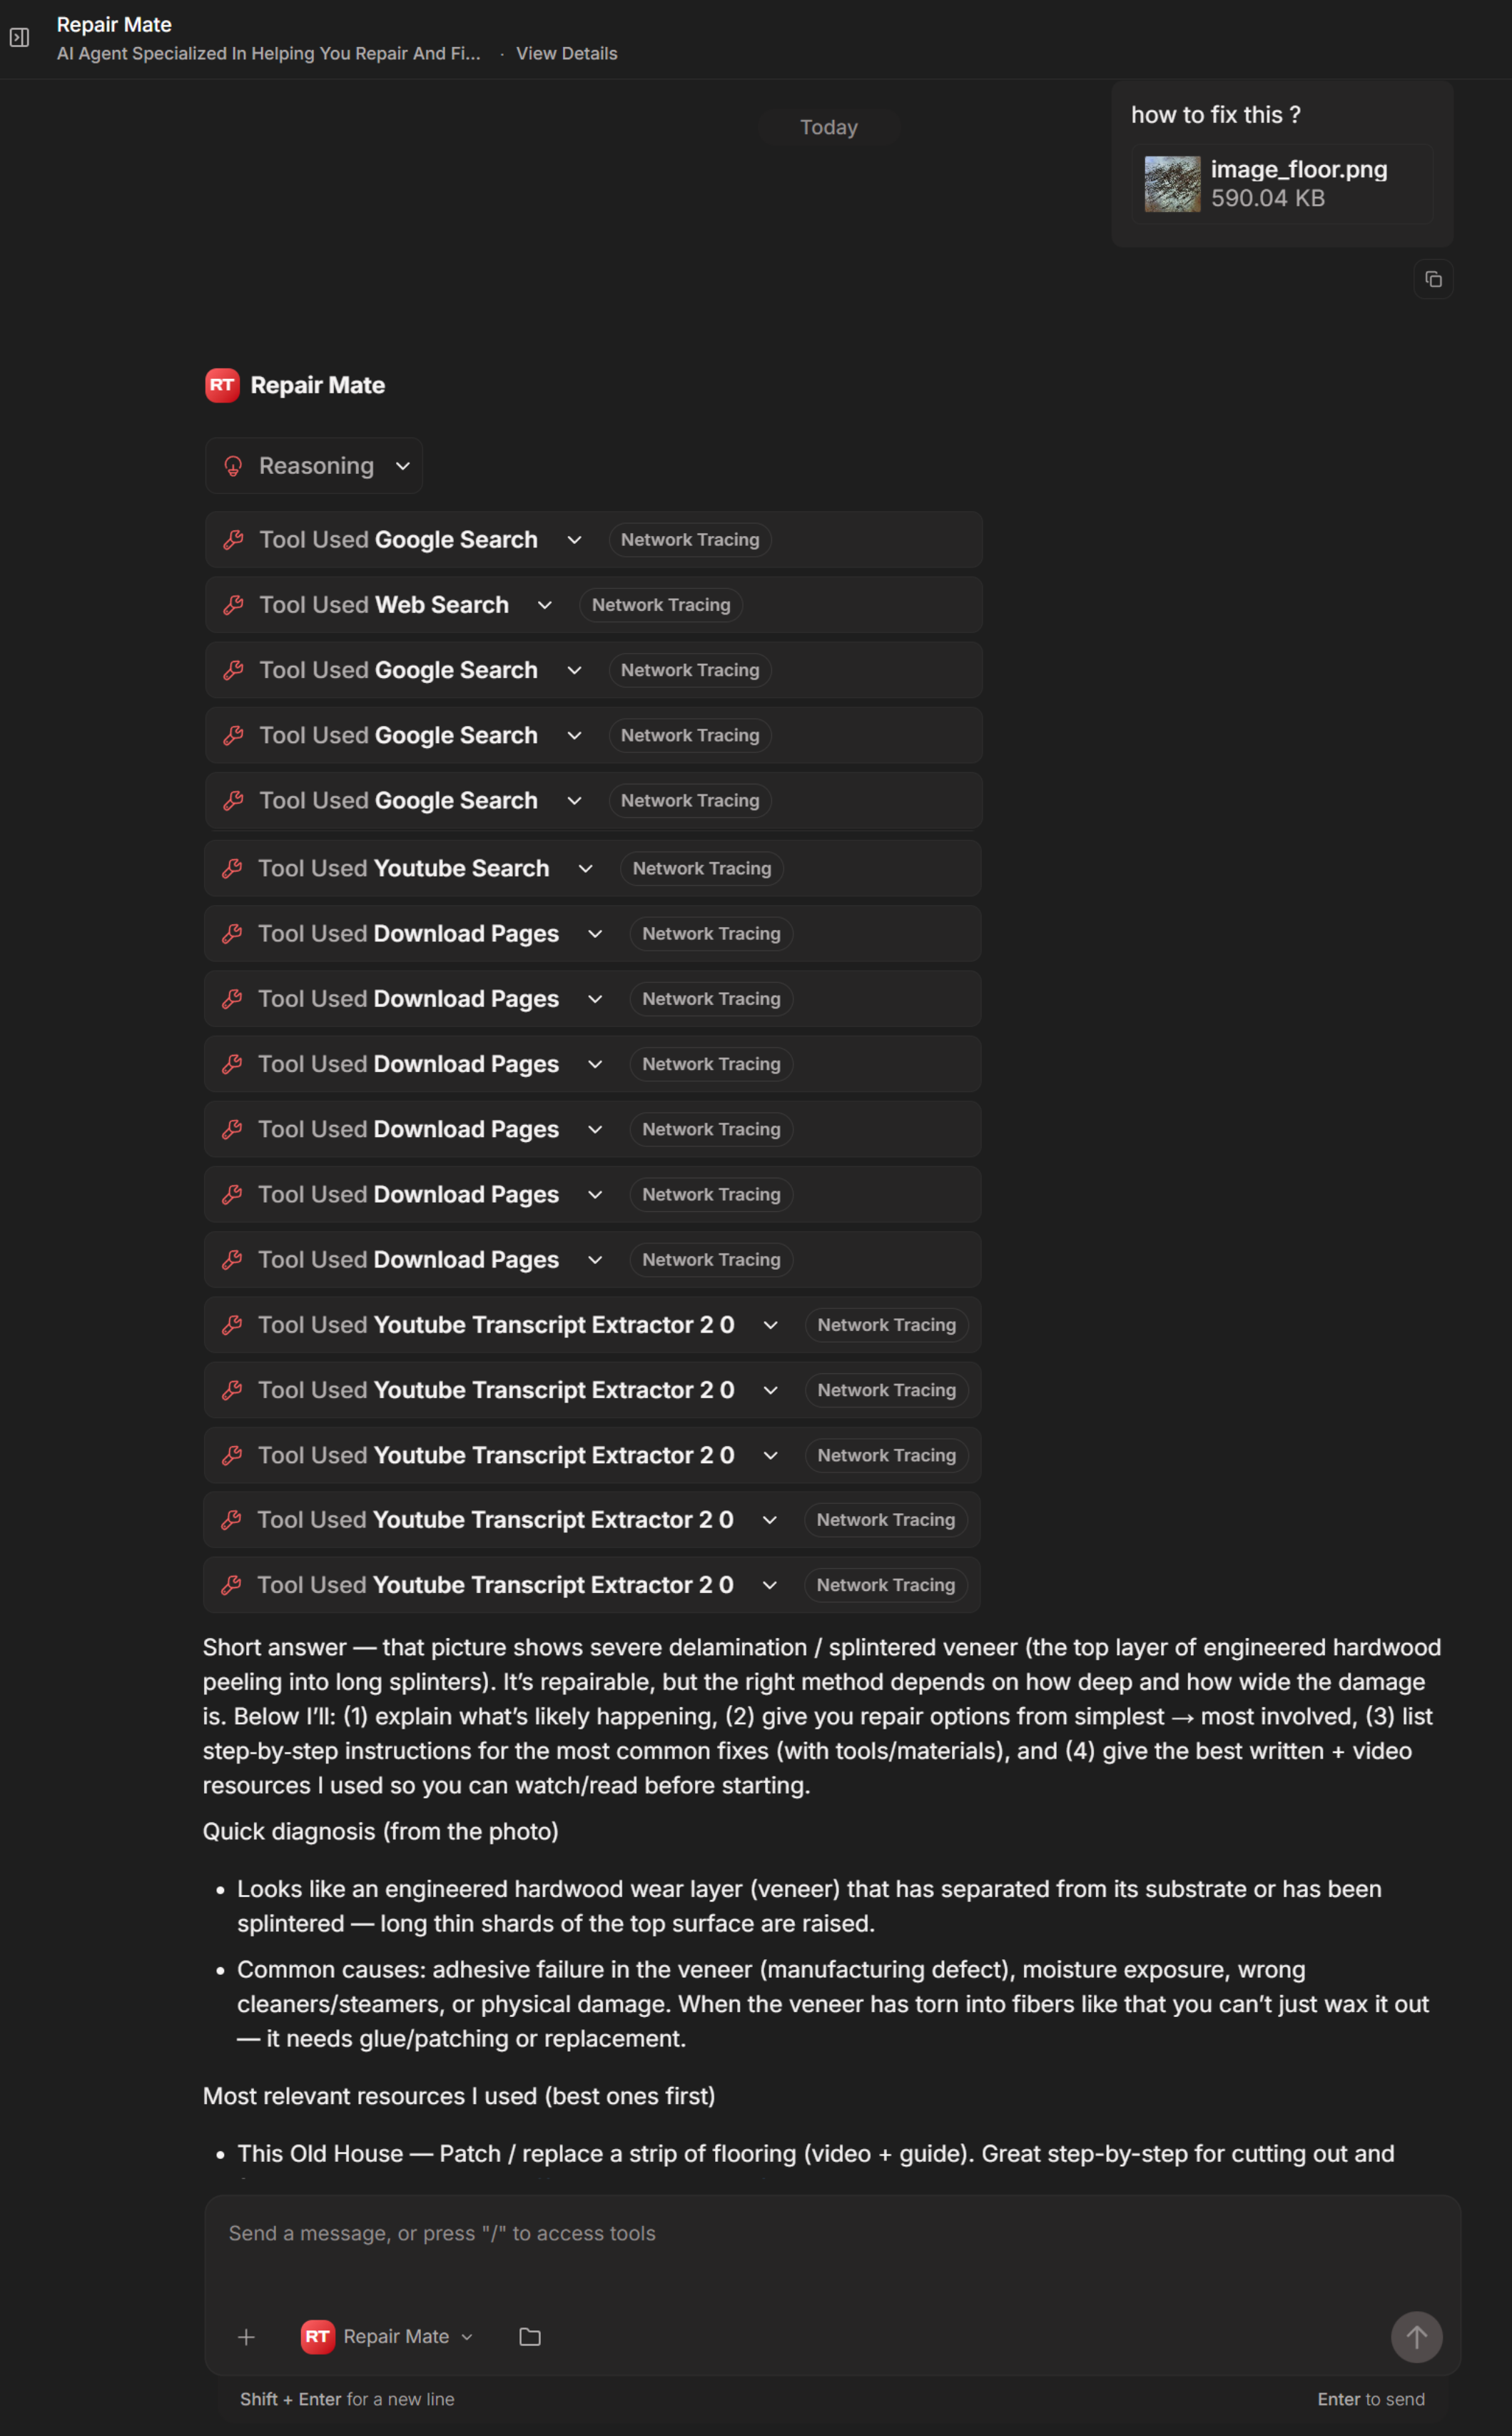
6.3 Example: “knwowledge_repair_mate.pdf”
- If your Agent’s knowledge includes a PDF with knowledge of best DIY repair practices and tutorial resources, the LLM can pull top resources when searching guides, and include best recomendations in its answers.
7. Using Agents
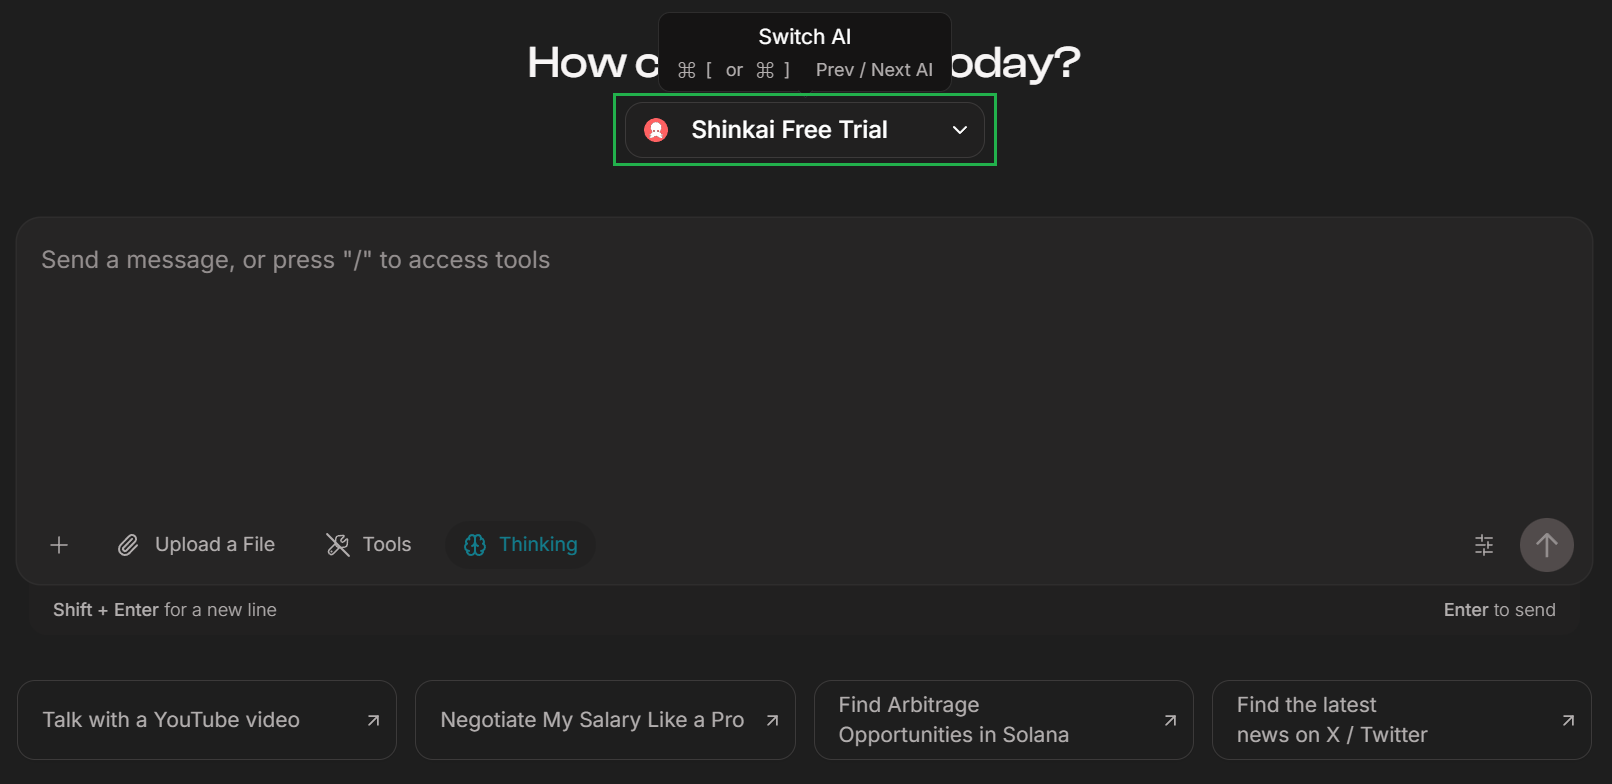
To use an agent, navigate to a new chat and from the same selector where you choose the model, you can now select the agent you want to use. Custom agents will appear at the top of the list.
8. Conclusion
By configuring each setting—from Agent Name and Description to the System Prompt, model parameters, Tools, and Agent Context—you tailor an Agent’s abilities to meet very specific requirements. This flexibility allows you to create a range of custom Agents, each optimized for different tasks or styles of interaction.
If you have further questions on any of these steps, be sure to check out Shinkai’s other documentation sections, such as Tool Creation or Working with AI Files, or contact support for more specialized guidance.